
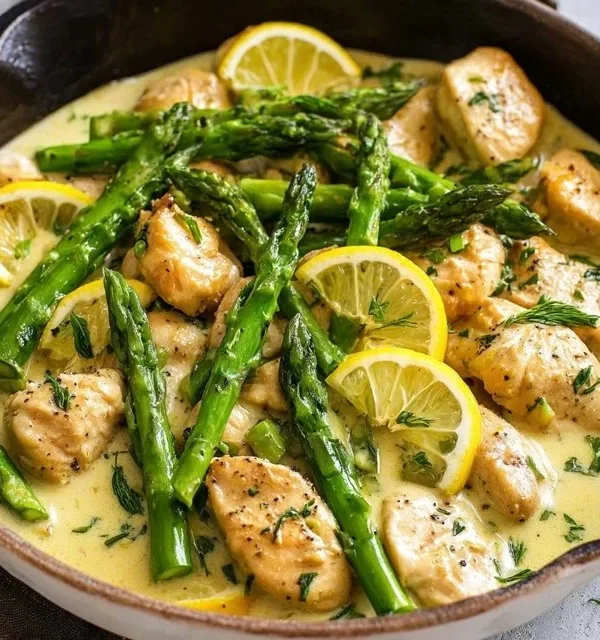
There’s something satisfying about a warm, cheesy quesadilla filled with savory chicken, colorful peppers, and a blend of spices. It’s the kind of dish that works well for weeknight dinners, lazy weekends, or even casual gatherings with friends. The balance of flavors and textures in these quesadillas offers comfort and simplicity, making it a reliable choice for many occasions. Let’s get right into how to create this easy, delicious meal that’s sure to please everyone.
Why You’ll Love This Recipe blackstone Chicken Fajita Quesadillas
These Blackstone Chicken Fajita Quesadillas shine for their ease and reliability, creating a comforting meal packed with balanced flavor. The combination of seasoned chicken, sautéed vegetables, and melted cheese between warm tortillas results in a satisfying dish perfect for everyday dinners. Whether you’re cooking for your family or hosting friends, this recipe offers practical value, making it a great addition to your rotation.
Kitchen Tools You’ll Need
- Large skillet or griddle
- Cutting board
- Sharp knife
- Spatula
Ingredients
- Cooking oil of choice (for sautéing)
- 1 onion (sliced for sweetness and flavor)
- 1 red bell pepper (sliced for sweetness)
- 1 poblano pepper (sliced for mild heat)
- 1 pound chicken breast (cut into thin strips or bite size pieces for tenderness)
- 1 tablespoon garlic paste or minced garlic (for aromatic flavor)
- 1 packet taco seasoning or fajita seasoning (for added flavor)
- 4 large burrito size tortillas (providing structure and holding ingredients)
- 3 to 4 cups shredded cheese (I used Mexican blend for creaminess)
- Optional toppings: sour cream, salsa, shredded lettuce, hot sauce (for additional flavor and texture)

How to Make Blackstone Chicken Fajita Quesadillas
Step 1. Start by heating your choice of cooking oil in a large skillet or griddle over medium heat. Ensure the oil evenly coats the bottom so the ingredients sear nicely. This helps develop a rich, flavorful base. When you’re ready, you’ll notice the oil shimmering slightly, which indicates it’s hot enough for the next steps.
Step 2. Add the sliced onion to the skillet. Stir occasionally as it cooks, keeping an eye on its color and texture. The goal is to achieve a tender, translucent onion. This process should take just a few minutes, and the onion’s natural sweetness will begin to enhance the dish.
Step 3. Introduce the sliced red bell pepper and poblano pepper to the skillet alongside the onion. Continue to sauté them all together, allowing their colors to brighten while they soften slightly. This step is crucial for building a flavorful mix, as the peppers contribute both sweetness and a bit of heat.
Step 4. Add in the chicken pieces and garlic paste or minced garlic. Stir everything well to ensure the chicken is coated with the oil and the flavors from the vegetables are being absorbed. As the chicken cooks through, it will become opaque and firm, indicating that it’s thoroughly cooked.
Step 5. Sprinkle the taco seasoning or fajita seasoning over the mixture. Stir well to distribute the seasoning evenly, marking the moment when all these flavors meld together. You will notice the dish becoming aromatic as the spices bloom in the heat, enhancing the overall taste.
Step 6. Once the chicken is fully cooked and the vegetables have softened, remove the skillet from the heat. This mixture should look enticing and smell wonderful, signaling that it’s ready for the next step of assembly.
Step 7. Take a large burrito-size tortilla and spoon a generous amount of the chicken and vegetable mixture onto one half. Sprinkle the desired amount of shredded cheese over the top to ensure it melts and binds the ingredients together. This assembly step is key to creating a delicious filling.
Step 8. Carefully fold the tortilla over, pressing gently to create a half-moon shape. This will hold your filling securely, and the cheese will help keep everything together once it melts. Repeat this process with the remaining tortillas until all the filling is used.
Step 9. Place the filled quesadillas back onto the skillet or griddle over medium heat. Cook each side until they become golden brown and crispy, with the cheese inside melting beautifully. This step brings in a delightful texture contrast between the crispy exterior and the gooey filling.
Step 10. Once golden brown, remove the quesadillas from the heat and let them rest briefly. This allows the cheese to firm up slightly, making them easier to cut and serve. You’ll want to see a beautiful golden color on the outside when they’re done.

Serving Suggestions
These quesadillas can take on many roles in your meal planning. They work wonderfully for breakfast, especially when paired with scrambled eggs or a side of fresh fruit. As a snack, they’re also delightful, offering a satisfying bite any time of the day. For family meals, serve them alongside a simple salad or your favorite dipping sauces. Any leftovers can be wrapped up, stored, and enjoyed later, making them a practical option you can prepare in advance.
Pro Tips for Best Results
- Ensure the skillet is hot enough before adding the ingredients; this promotes better searing and flavor development.
- Don’t overcrowd the skillet with filling; this could lead to uneven cooking.
- Let the quesadillas rest for a minute after cooking; this helps keep the filling intact when slicing.
- Customize the amount of cheese based on preference; more cheese means extra creaminess.
- Consider using a mix of cheeses for a more complex flavor if you’re feeling adventurous.
Common Mistakes to Avoid
- Overcooking the Chicken: If the chicken is left on the heat too long, it can dry out. Monitor its cooking time closely and remove it once it’s opaque and no longer pink.
- Skipping the Seasoning: Neglecting to season the chicken can lead to bland quesadillas. Make sure to sprinkle taco or fajita seasoning generously while cooking.
- Using Cold Tortillas: Cold tortillas can break when folded. Reheat them briefly if they’ve been stored in the fridge to make them more pliable.
- Not Letting Rest: Cutting the quesadillas immediately can cause the filling to spill out. Letting them rest helps everything settle.
- Filling Too Much: Overstuffing can make it hard to close the quesadilla properly. Aim for a balanced amount of filling for easier handling.
- Neglecting to Preheat Your Skillet: If the skillet isn’t hot enough, tortillas may become chewy rather than crispy. Always ensure it’s preheated for the best texture.
Variations & Substitutions
For a twist, consider adding black beans or corn to the filling for extra texture and nutrition. You might also try adding fresh herbs or using different types of cheese like pepper jack for a kick. If you prefer, swap in cooked shrimp or beef for varied protein options, while keeping the same seasoning and veggie mix.
Storage & Reheating
Quesadillas should be stored at room temperature for a short time, but for longer storage, refrigerate them in an airtight container, where they can last up to three days. If you want to freeze them, wrap each quesadilla tightly in plastic wrap before placing them in a freezer-safe bag to ensure quality. When it’s time to reheat, a skillet is the best method for maintaining crispiness; just warm over medium heat until heated through, flipping halfway.
Frequently Asked Questions
Can I make this recipe ahead of time?
Yes, you can prepare the filling ahead of time and store it in the fridge. When you’re ready to eat, just assemble the quesadillas and cook them.
How long does it last in the fridge?
Stored in an airtight container, these quesadillas can last up to three days in the fridge, making them a practical option for meal prep.
Can I freeze this recipe?
Absolutely! Quesadillas can be wrapped and frozen for up to three months. Just thaw them in the refrigerator before reheating.
What can I substitute for one ingredient?
You can swap the chicken for other proteins like beef, shrimp, or even tofu for a vegetarian option while keeping the same seasoning and vegetable mixture.
Why didn’t my recipe turn out as expected?
Factors like overcooking chicken, not seasoning enough, or skipping the resting step can lead to less-than-ideal results. Following each step carefully will help avoid issues.
Final Thoughts
Making Blackstone Chicken Fajita Quesadillas is a straightforward process, resulting in a cozy, flavorful meal that fits various occasions. The comforting combination of chicken, peppers, and cheese wrapped in a crispy tortilla makes for a satisfying experience, whether it’s for family dinner or a nighttime snack. Enjoy the simplicity and warmth these quesadillas bring into your kitchen.

Blackstone Chicken Fajita Quesadillas
Ingredients
For the Filling
- 1 tablespoon cooking oil of choice For sautéing
- 1 medium onion Sliced for sweetness and flavor
- 1 medium red bell pepper Sliced for sweetness
- 1 medium poblano pepper Sliced for mild heat
- 1 pound chicken breast Cut into thin strips or bite-size pieces for tenderness
- 1 tablespoon garlic paste or minced garlic For aromatic flavor
- 1 packet taco seasoning or fajita seasoning For added flavor
- 4 large burrito size tortillas Providing structure and holding ingredients
- 3-4 cups shredded cheese I used Mexican blend for creaminess
Optional Toppings
- sour cream For additional flavor and texture
- salsa For additional flavor and texture
- shredded lettuce For additional flavor and texture
- hot sauce For additional flavor and texture
Instructions
Preparation
- Start by heating your choice of cooking oil in a large skillet or griddle over medium heat until shimmering.
- Add the sliced onion to the skillet and stir occasionally until tender and translucent.
- Introduce the sliced red bell pepper and poblano pepper to the skillet, continuing to sauté until softened.
- Add in the chicken pieces and garlic paste, stirring to coat the chicken.
- Sprinkle the taco or fajita seasoning over the mixture, stirring well to distribute evenly.
- Ensure the chicken is fully cooked and the vegetables are soft before removing the skillet from the heat.
Assembly and Cooking
- Spoon a generous amount of the chicken and vegetable mixture onto one half of a tortilla and sprinkle shredded cheese over the top.
- Fold the tortilla over to create a half-moon shape and repeat with the remaining tortillas.
- Cook the filled quesadillas on medium heat until golden brown and crispy, flipping carefully.
- Remove the quesadillas from the heat and let them rest briefly before cutting and serving.


Leave a Reply