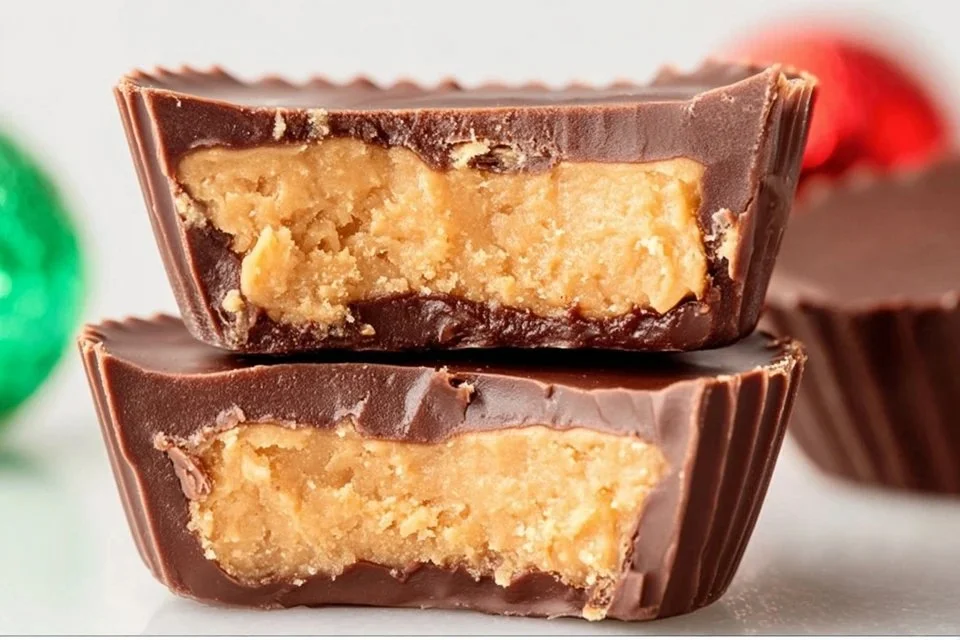
There’s something truly comforting about creating a sweet treat to share or to enjoy quietly at home. This recipe for homemade peanut butter cups combines the delightful taste of chocolate with the creamy texture of peanut butter. They’re perfect for winding down in the evenings, making memories on weekends, or bringing to gatherings. The simplicity of the process allows for creativity, making it a reliable option for any occasion. Let’s dive into this satisfying recipe that you can easily whip up in your own kitchen.
Why You’ll Love This Homemade Peanut Butter Cups recipes us
These homemade peanut butter cups are an easy and reliable dessert that can bring comfort without the need for elaborate steps. With their balanced flavor of rich chocolate and creamy peanut butter, they provide a simple yet delightful indulgence. Whether you’re making them for family or just for yourself, their practical everyday value makes them a wonderful treat to look forward to.
Kitchen Tools You’ll Need
- Mixing bowl
- Microwave-safe bowl
- Spoon or spatula
- Mini muffin tin
- Paper liners
Ingredients
- 12oz Chocolate Chips (milk, semi-sweet, white or dark chocolate) (adds sweetness and richness)
- ½ cup peanut butter (creamy or crunchy) (provides smooth texture and nutty flavor)
- ¼ cup confectioner’s sugar (sweetens and helps bind)
- 2 teaspoons butter (adds richness and improves texture)
How to Make Homemade Peanut Butter Cups recipes us
Step 1. Begin by placing the chocolate chips in a microwave-safe bowl. Melt the chocolate gently in the microwave, stopping to stir every 30 seconds until it is smooth and fully melted. This will ensure it doesn’t burn and maintains a pleasing consistency.
Step 2. Prepare a mini muffin tin by lining it with paper liners. This will help with easy removal after the peanut butter cups have set, ensuring a neat and presentable treat.
Step 3. Pour a small amount of melted chocolate into each muffin liner, just enough to cover the bottom. Use a spoon or spatula to spread it evenly if necessary. This layer creates a delicious base for the peanut butter filling.
Step 4. Place the muffin tin in the freezer for about 10 minutes or until the chocolate is set hard. You’ll know it is ready when you can easily tap on the chocolate and it feels firm to the touch.
Step 5. Meanwhile, mix the peanut butter, confectioner’s sugar, and butter in a bowl until well combined and smooth. This filling will have a thick but creamy texture, providing a nice contrast to the chocolate.
Step 6. Remove the muffin tin from the freezer and spoon a small amount of the peanut butter mixture on top of the set chocolate in each liner. Make sure to leave enough space for an additional layer of chocolate on top.
Step 7. Pour the remaining melted chocolate over the peanut butter layer in each cup, covering the peanut butter completely. This will ensure a lovely shell of chocolate surrounding the filling.
Step 8. Return the muffin tin to the freezer for another 15-20 minutes or until the tops are set. You’ll know they’re ready when the chocolate is firm and no longer shiny.
Step 9. Carefully remove the peanut butter cups from the muffin tin by lifting out the paper liners. They should come out easily, revealing your delicious homemade treats.
Step 10. Let the peanut butter cups come to room temperature for about 10 minutes before serving. This will enhance the flavors and make them easier to enjoy.

Serving Suggestions
These homemade peanut butter cups can be enjoyed in various ways. They make a delightful finger food for breakfast alongside coffee or milk, perfect for a quick snack during the day. For family meals, serve them as a fun dessert option that everyone will enjoy. If you have leftovers, they can be easily stored in the refrigerator for a treat at any time. They also travel well, making them suitable for sharing at gatherings or potlucks.
Pro Tips for Best Results
- Make sure not to overheat the chocolate when melting, as it can become grainy.
- For a smoother filling, ensure the peanut butter is well mixed and creamy before adding sugar and butter.
- Use standard-size muffin tins for larger cups if you prefer.
- Make sure the bottom chocolate layer is not too thick to find a good balance with the filling.
- For easier cleanup, line the muffin tin thoroughly to prevent sticking and aid in removal.
- Consider varying the chocolate types for different flavor profiles.
Common Mistakes to Avoid
1. Overheating the Chocolate: Melting chocolate too quickly or at too high a temperature can cause it to seize and become unusable. Heat it gradually and stir often.
2. Not Letting Layers Set Properly: Skipping the cooling times between layers can lead to a mess when the chocolate and peanut butter mix instead of forming distinct layers. Be patient for each layer to set.
3. Using Low-Quality Chocolate: While you might be tempted to save on ingredients, using poor-quality chocolate can affect the overall taste and texture of the peanut butter cups. Choose a chocolate you enjoy eating.
4. Not Measuring Ingredients Accurately: Baking and candy-making require precise measurements. Eyeballing ingredients can lead to inconsistencies in flavor and texture.
5. Leaving Cups Too Long at Room Temperature: If they’re left out for too long after setting, the chocolate might soften too much, making them difficult to handle. Keep them stored properly if not serving immediately.
6. Attempting to Rush the Freezing Process: It might be tempting to skip the waiting time, but not allowing the layers to cool thoroughly will prevent a good final product. Give each layer enough time to set.
Variations & Substitutions
For a variation, you might try using almond butter or any nut butter in place of peanut butter for a different flavor. Another option is to sprinkle sea salt on top of the melted chocolate before it sets for a sweet and salty twist. You could also experiment with adding a bit of vanilla extract to the peanut butter mix for an added layer of flavor.
Storage & Reheating
Store the peanut butter cups at room temperature in an airtight container for optimal freshness. If you prefer your treats cooler, they can also be kept in the refrigerator. Freezing is an option, too—just ensure they are well-wrapped to maintain their texture. When you want to enjoy them, allow them to thaw briefly at room temperature for the best taste and texture.
Nutrition Information
Unfortunately, nutrition information is not available for this recipe.
Frequently Asked Questions
Can I make this recipe ahead of time?
Yes, you can make these peanut butter cups a few days in advance. They store well in the fridge or at room temperature and are perfect for grabbing as a quick treat.
How long does it last in the fridge?
When stored properly in an airtight container, the peanut butter cups can last for about a week in the refrigerator.
Can I freeze this recipe?
Absolutely! These can be frozen for up to three months. Just remember to separate layers with parchment paper before freezing to keep them from sticking together.
What can I substitute for one ingredient?
If you’re looking to replace the confectioner’s sugar, you could try using granulated sugar, keeping in mind it may change the texture slightly.
Why didn’t my recipe turn out as expected?
Issues like burning chocolate or not allowing layers to set can affect the outcome. Ensure you follow the melting and cooling steps carefully to achieve the best results.
Final Thoughts
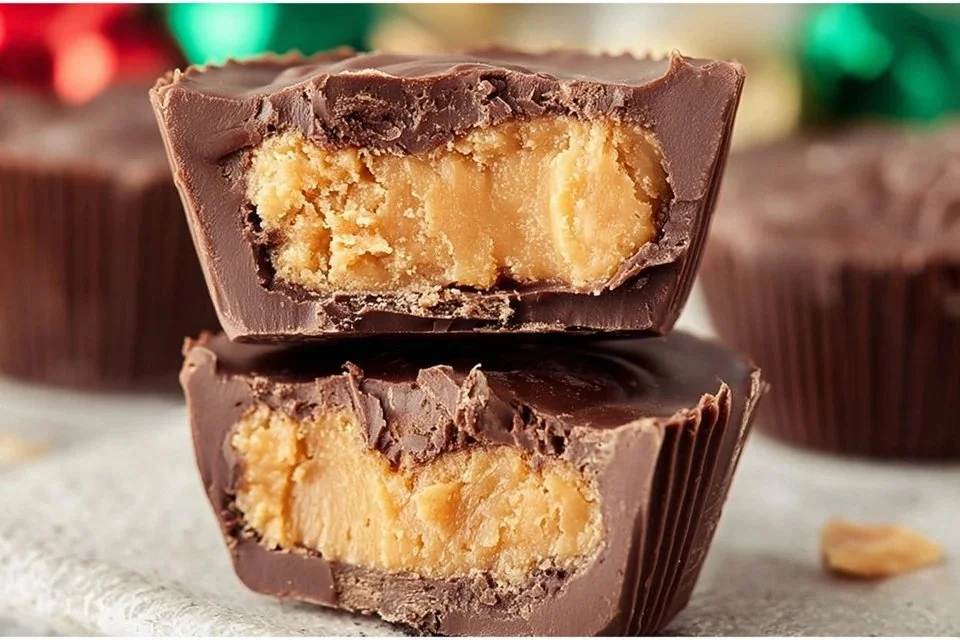
Making homemade peanut butter cups is a satisfying experience that fills the kitchen with inviting aromas and brings comfort with each bite. Whether enjoyed alone or shared with others, these treats are simple yet delightful. Feel confident knowing that you can create this rewarding recipe in your own home, adding a touch of sweetness to your everyday routine.

Homemade Peanut Butter Cups
Ingredients
Chocolate Layer
- 12 oz Chocolate Chips (milk, semi-sweet, white or dark chocolate) adds sweetness and richness
Peanut Butter Filling
- ½ cup peanut butter (creamy or crunchy) provides smooth texture and nutty flavor
- ¼ cup confectioner's sugar sweetens and helps bind
- 2 teaspoons butter adds richness and improves texture
Instructions
Preparation
- Begin by placing the chocolate chips in a microwave-safe bowl. Melt the chocolate gently in the microwave, stirring every 30 seconds until smooth.
- Prepare a mini muffin tin by lining it with paper liners.
- Pour a small amount of melted chocolate into each muffin liner, enough to cover the bottom.
- Place the muffin tin in the freezer for about 10 minutes until the chocolate is set hard.
- Mix the peanut butter, confectioner's sugar, and butter in a bowl until well combined and smooth.
- Remove the muffin tin from the freezer, spoon a small amount of the peanut butter mixture on top of the set chocolate.
- Pour the remaining melted chocolate over the peanut butter layer, covering it completely.
- Return the muffin tin to the freezer for another 15-20 minutes until the tops are set.
- Carefully remove the peanut butter cups from the muffin tin by lifting out the paper liners.
- Let the peanut butter cups come to room temperature for about 10 minutes before serving.

Leave a Reply