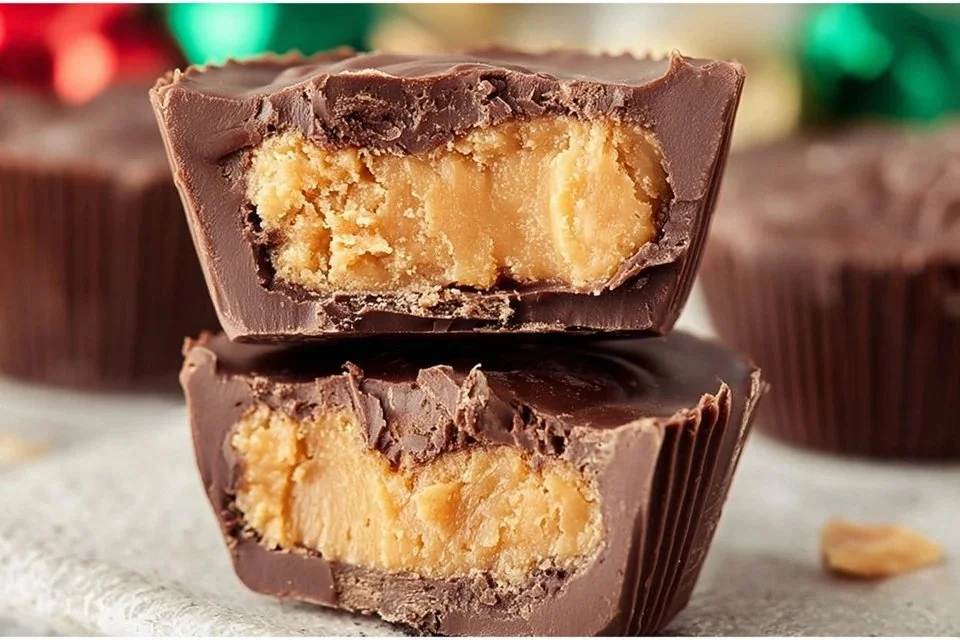
There’s something comforting about blending rich chocolate with creamy peanut butter. This Peanut Butter Cup Recipe brings together those familiar flavors in a delightful treat. Whether enjoyed on a quiet evening or shared at family gatherings, these homemade delights offer a sweet escape from the everyday. Their simplicity makes them perfect for weeknight treats or a sweet addition to weekend baking sessions. Let’s step into the kitchen and create something satisfying together.
Why You’ll Love This Recipe
This Peanut Butter Cup Recipe offers ease and reliability, making it a go-to for moments when you need a comforting dessert. The balanced flavor of creamy peanut butter paired with chocolate ensures every bite is pleasing. It’s a practical option for everyday indulgence, and the straightforward process makes it accessible for all home cooks.
Kitchen Tools You’ll Need
- Mixing bowls
- Microwave-safe container
- Baking pan
- Parchment paper
Ingredients
- 2 ⅓ cups milk chocolate chips or semi sweet (provides sweetness and rich chocolate flavor)
- 2 tsp shortening (adds smoothness to melted chocolate)
- 1 ¾ cup powdered sugar (sweetens and helps achieve the right texture)
- 1 cup creamy peanut butter (creates a rich, creamy filling)
- ¼ cup salted butter (room temp) (adds moisture and a buttery flavor)
- 1 ½ tsp vanilla extract (enhances overall flavor)
- 1 tsp salt (balances sweetness)
How to Make Peanut Butter Cup Recipe
Step 1. Begin by melting the chocolate chips and shortening together. Place the chocolate chips and shortening in a microwave-safe bowl. Heat in the microwave in short bursts, stirring after each interval until fully melted and smooth in texture. The mixture should be glossy and easily pourable.
Step 2. Prepare your baking pan. Line an 8-inch or 9-inch square baking pan with parchment paper, leaving some overhang to easily lift out the finished treats later. This preparation helps prevent sticking and makes for easy removal.
Step 3. Pour a layer of the melted chocolate into the prepared pan. Pour about half of the melted chocolate mixture into the pan, spreading it evenly across the bottom. Use a spatula to ensure that it covers the entire surface, creating a solid foundation.
Step 4. Refrigerate until firm. Place the pan in the refrigerator and allow the chocolate to set. This step is important for creating a base that will support the filling, typically requiring about 15-20 minutes.
Step 5. While the chocolate sets, make the peanut butter filling. In a mixing bowl, combine the creamy peanut butter, room temperature salted butter, powdered sugar, and vanilla extract. Stir until the mixture is well-combined, smooth, and creamy. The filling should have a slightly thick yet spreadable consistency.
Step 6. Once the chocolate has hardened, spread the peanut butter mixture over the chocolate base. Remove the pan from the refrigerator, and carefully spread the peanut butter filling over the hardened chocolate layer, ensuring it’s evenly distributed all the way to the edges.
Step 7. Top with remaining chocolate. Pour the remaining melted chocolate over the peanut butter layer, covering it completely. Use a spatula to smooth the top, making sure to seal in the peanut butter and create a uniform layer of chocolate on top.
Step 8. Chill until set. Return the pan to the refrigerator for at least an hour, or until the top layer has completely hardened. The layers should feel firm to the touch when ready.
Step 9. Once set, remove from the pan and cut into squares. Carefully lift the treat out of the pan using the parchment overhang. Use a sharp knife to cut into squares or bars, making sure to slice all the way through the layers.
Step 10. Serve and enjoy your homemade treats. These peanut butter cups can be served immediately or stored for later. They offer a delicious balance of flavors that are sure to satisfy.

Serving Suggestions
These peanut butter cups make for delightful snacks, whether you’re enjoying one with your morning coffee or sharing them during family meals. They work wonderfully as an easy dessert option on busy weeknights, or you can offer them at gatherings with friends and family. If you happen to have any leftovers, they store well and can be enjoyed for a sweet pick-me-up anytime.
Pro Tips for Best Results
- Ensure chocolate is fully melted for a smooth coating to avoid clumps.
- Use room temperature butter in the filling for easier mixing and creaminess.
- Chilling the layers properly is crucial for maintaining structure and texture.
- Consider using different chocolate types for varied flavor profiles.
- If you prefer, adjust the amount of powdered sugar in the filling for sweetness.
- Keep the treats cool, as chocolate can soften at room temperature.
Common Mistakes to Avoid
- Not melting chocolate gently. Melting chocolate too quickly can cause it to seize. Use short, controlled bursts in the microwave.
- Skipping the refrigeration step. If you don’t let the layers set properly, the filling may ooze out when cut. Patience is key.
- Not spreading the layers evenly. Uneven layers can lead to an imbalance of flavors. Take care when spreading each layer.
- Using cold peanut butter. Cold peanut butter can make the filling hard to mix. Always use it at room temperature for better texture.
- Cutting before fully chilled. Cutting into the treats too soon may result in messy edges. Allow ample time for all layers to set.
- Not lining the pan. Failing to line the baking pan can make it difficult to remove the cups later. Always use parchment paper for ease.
Variations & Substitutions
For a twist, consider using dark chocolate instead of milk chocolate for a richer flavor, or add a sprinkle of sea salt on top for a contrast to the sweetness. You could also experiment with crunchy peanut butter for added texture or mix in some chopped nuts for an extra crunch.
Storage & Reheating
Store these peanut butter cups at room temperature for a few days. For longer storage, keep them in the refrigerator for up to two weeks. If you want to freeze them, wrap the pieces tightly in plastic wrap and then in aluminum foil. For best results, thaw in the refrigerator to maintain texture. There’s no reheating needed, as they’re best enjoyed chilled.
Frequently Asked Questions
Can I make this recipe ahead of time?
Yes, these peanut butter cups can be made ahead of time and stored in the refrigerator. They taste just as delightful after a day or two.
How long does it last in the fridge?
When stored properly, they can last in the refrigerator for up to two weeks, making them great for prepping in advance.
Can I freeze this recipe?
Yes, you can freeze these treats. Wrap them tightly and store them in a freezer-safe container for up to three months.
What can I substitute for one ingredient?
If you don’t have shortening, you can use coconut oil as an alternative for melting with the chocolate, although it will slightly change the flavor.
Why didn’t my recipe turn out as expected?
Common issues include not letting the layers set properly or melting the chocolate too quickly. Ensure you follow the steps carefully for the best results.
Final Thoughts
Making these peanut butter cups is a satisfying process that leads to a delicious outcome. Their familiar flavors and simple preparation make them a perfect treat for any occasion. As you enjoy them, take comfort in the idea that such a delightful dessert can be created at home with ease. Happy cooking!

Peanut Butter Cups
Ingredients
Chocolate Layer
- 2 ⅓ cups milk chocolate chips or semi sweet provides sweetness and rich chocolate flavor
- 2 tsp shortening adds smoothness to melted chocolate
Peanut Butter Filling
- 1 cup creamy peanut butter creates a rich, creamy filling
- 1 ¾ cups powdered sugar sweetens and helps achieve the right texture
- ¼ cup salted butter (room temp) adds moisture and a buttery flavor
- 1 ½ tsp vanilla extract enhances overall flavor
- 1 tsp salt balances sweetness
Instructions
Preparation
- Begin by melting the chocolate chips and shortening together in a microwave-safe bowl. Heat in the microwave in short bursts, stirring after each interval until fully melted and smooth.
- Line an 8-inch or 9-inch square baking pan with parchment paper, leaving some overhang for easy removal later.
- Pour about half of the melted chocolate into the prepared pan, spreading it evenly across the bottom.
- Refrigerate the pan to allow the chocolate to set for about 15-20 minutes.
Filling Preparation
- While the chocolate sets, make the peanut butter filling by combining the creamy peanut butter, room temperature salted butter, powdered sugar, and vanilla extract in a mixing bowl. Stir until smooth and creamy.
- Once the chocolate has hardened, spread the peanut butter mixture evenly over the chocolate base.
Final Assembly
- Pour the remaining melted chocolate over the peanut butter layer, smoothing the top with a spatula.
- Chill the assembled cups in the refrigerator for at least an hour or until the top layer is completely hardened.
- Carefully lift the treat out of the pan using the parchment overhang and cut into squares or bars.
- Serve and enjoy your homemade peanut butter cups, either immediately or stored for later.


Leave a Reply