
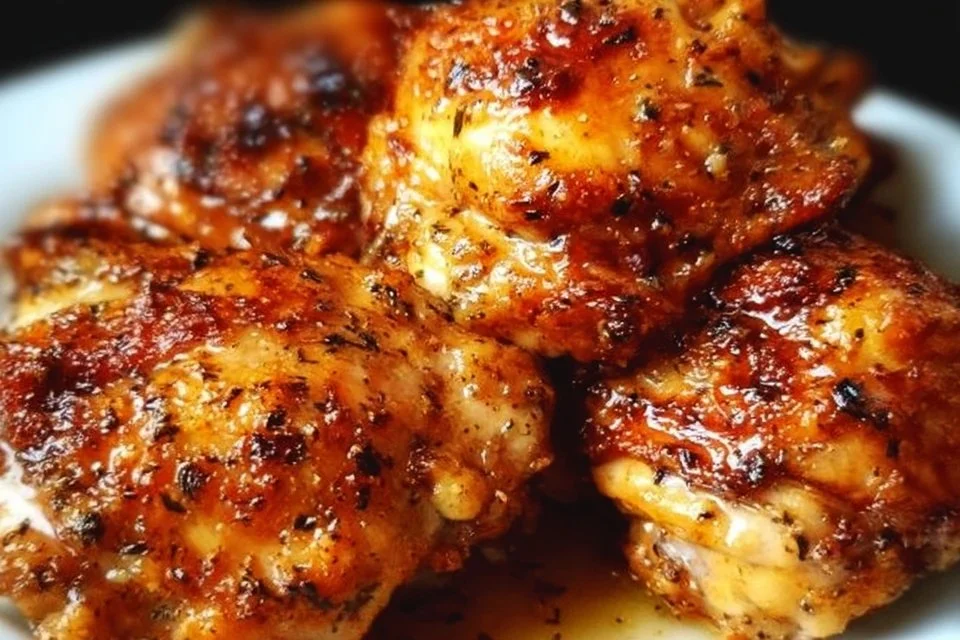
Why You’ll Love This Recipe
This recipe is loved for its simplicity and consistency. The ease of preparation means you can rely on it for busy weeknights. The balance of crispy breadcrumbs and Parmesan provides comforting flavor, making it a joy to serve. Perfect for family meals or casual gatherings, these homemade baked chicken tenders deliver practical everyday value that everyone appreciates.
Kitchen Tools You’ll Need
- Baking sheet
- Mixing bowls
- Whisk
- Measuring cups and spoons
- Knife and cutting board
- Cooking spray or brush
Ingredients
- 1 lb chicken breasts, cut into strips (for tenderness)
- 1 cup breadcrumbs (adds crunch)
- 1/2 cup grated Parmesan cheese (for flavor)
- 1 teaspoon garlic powder (for seasoning)
- 1 teaspoon paprika (for warmth)
- Salt and pepper to taste (for flavor enhancement)
- 1 egg, beaten (acts as a binder)
- Cooking spray or olive oil (for moisture)
How to Make Homemade Baked Chicken Tenders
Step 1: Preheat your oven to 400°F. This initial step is crucial for ensuring that your chicken tenders cook evenly and results in a crispy texture. An adequately heated oven helps achieve a golden-brown crust, enhancing both flavor and presentation. Make sure the oven reaches the right temperature before you place your tenders inside for the best results.
Step 2: Prepare a baking sheet by lightly coating it with cooking spray or olive oil. This step prevents the chicken tenders from sticking and ensures they can crisp up nicely on the sides. Use just enough to create a thin, even layer on the baking sheet. A well-prepared surface allows for easy cleanup once the tenders are done baking.
Step 3: In a mixing bowl, combine breadcrumbs, grated Parmesan cheese, garlic powder, paprika, salt, and pepper. Stir these ingredients together until they are evenly mixed. This mixture will create the flavorful coating for your chicken. Take your time to ensure even distribution of the seasonings, as this will lead to a well-seasoned crust on your tenders.
Step 4: In another bowl, beat the egg until it’s fully mixed. This will serve as a binding agent for the breadcrumbs. A smooth, well-beaten egg helps the coating adhere better to the chicken strips, and that means a more satisfying crunch once they are baked. Make sure there are no clumps in the egg mixture to ensure a consistent coating.
Step 5: Dip each chicken strip into the beaten egg, making sure to coat it completely. This process is essential for ensuring that the breadcrumbs stick properly. Shake off any excess egg before moving on to the next step, as too much egg can create a soggy coating instead of a nice crisp texture.
Step 6: After coating the chicken in egg, roll each strip in the breadcrumb mixture. Make sure to press gently so that the breadcrumbs adhere well to the chicken. An even coating guarantees not only taste but also an appealing crunch after baking. Take care to cover each piece thoroughly to maximize flavor in every bite.
Step 7: Once all the strips are coated, place the chicken tenders on the prepared baking sheet in a single layer. Avoid overcrowding the pan, as this can lead to steaming rather than crisping. Leave a little space between each piece to allow hot air to circulate and ensure that they cook evenly with a nice golden exterior.
Step 8: Bake the chicken tenders in the preheated oven for 20-25 minutes or until they are golden brown and the internal temperature reaches 165°F. Keep an eye on them during baking, as cooking times can vary based on your oven. Once cooked, the tenders should look crispy and feel firm to the touch.
Serving Suggestions
These chicken tenders make for a versatile meal option. Serve them with a variety of dipping sauces, like barbecue, ranch, or honey mustard, for a fun twist. They also work well as part of a family meal alongside roasted vegetables or a fresh salad. Leftovers can be enjoyed cold for lunch or reheated for a quick snack. They’re perfect for any time of the day, so feel free to get creative!
Pro Tips for Best Results
- Ensure that all chicken pieces are evenly sized for consistent cooking.
- Allow the chicken strips to rest for a few minutes after removing them from the oven. This will help retain moisture.
- Experiment with different seasonings in the breadcrumb mixture for variety.
- Use fresh breadcrumbs for a lighter coating.
- If you want extra crunch, you can toast the breadcrumbs lightly in a pan before adding them to the mixture.
- Rotate the baking sheet halfway through cooking for even browning.
Common Mistakes to Avoid
- Not Preheating the Oven: Baking without preheating can cause uneven cooking and a lack of crispness. Always allow your oven to reach the set temperature first for best results.
- Overcrowding the Baking Sheet: Placing too many chicken strips close together prevents proper air circulation, resulting in soggy rather than crispy tenders. Ensure they are spaced adequately.
- Skipping the Egg Bath: Neglecting to coat the chicken in egg means your breadcrumbs won’t adhere well. This can lead to a patchy coating and less flavor overall.
- Using Old Breadcrumbs: Stale breadcrumbs may not provide the desired crunch and flavor impact. Always use fresh breadcrumbs for optimal results.
- Not Tasting Seasonings: Failing to taste your breadcrumb mixture may leave the tenders bland. Make sure to season adequately so that each bite is flavorful.
- Underestimating Cooking Time: Overly confident assumptions about cooking time can lead to undercooked chicken. Use a meat thermometer to check for doneness, ensuring safety and quality.
Variations & Substitutions
For a healthier twist, consider using whole wheat breadcrumbs or a gluten-free alternative. You might add different spices such as Italian herbs or cayenne for heat. For a layered flavor, try marinating the chicken in a little bit of lemon juice or yogurt prior to breading. You can also swap the Parmesan for another cheese if desired, though this may alter the dish’s flavor slightly.
Storage & Reheating
At room temperature, chicken tenders can sit out for about two hours. For longer storage, keep them in an airtight container in the refrigerator for up to three days. If you’re looking to prolong their shelf life, you can freeze cooked tenders in an airtight container for about two months. To reheat, place them in an oven or toaster oven at 350°F until warmed through to retain their crisp texture.
Nutrition Information
Nutrition values are estimates and may vary based on ingredients used.
Frequently Asked Questions
Can I make this recipe ahead of time? Yes, you can prepare the chicken tenders ahead of time by breading them and then storing them in the refrigerator until you’re ready to bake. This can save time on busy nights.
How long does it last in the fridge? Homemade baked chicken tenders will last in the refrigerator for about three days when stored in an airtight container. Make sure to allow them to cool completely before refrigerating.
Can I freeze this recipe? Yes, you can freeze the cooked chicken tenders. They freeze well and can be stored in an airtight container for up to two months. Just make sure they are fully cooled before freezing.
What can I substitute for one ingredient? If you don’t have breadcrumbs, crushed cornflakes or panko can work as alternatives. They’ll give you a unique texture while still creating a crunchy coating.
Why didn’t my recipe turn out as expected? Common issues, such as soggy tenders or uneven cooking, often result from overcrowding the baking sheet or not preheating the oven properly. Also, ensure all ingredients are fresh for the best flavor and texture.
Final Thoughts
Making Homemade Baked Chicken Tenders is not only enjoyable but also rewarding. These tenders are perfect for family meals, easy snacks, or laid-back gatherings. With a bit of preparation and attention to detail, you can create a comforting dish that everyone will love. Remember that cooking is a journey, and with practice, you’ll master it in no time. Enjoy the process and the delicious results.

Baked Chicken Tenders
Ingredients
Main Ingredients
- 1 lb chicken breasts, cut into strips for tenderness
- 1 cup breadcrumbs adds crunch
- 1/2 cup grated Parmesan cheese for flavor
- 1 teaspoon garlic powder for seasoning
- 1 teaspoon paprika for warmth
- Salt and pepper to taste for flavor enhancement
- 1 large egg, beaten acts as a binder
- Cooking spray or olive oil for moisture
Instructions
Preparation
- Preheat your oven to 400°F.
- Prepare a baking sheet by lightly coating it with cooking spray or olive oil.
- In a mixing bowl, combine breadcrumbs, grated Parmesan cheese, garlic powder, paprika, salt, and pepper. Stir until evenly mixed.
- In another bowl, beat the egg until fully mixed.
- Dip each chicken strip into the beaten egg, coating it completely, then shake off excess egg.
- Roll each strip in the breadcrumb mixture, pressing gently to adhere well.
- Place the chicken tenders on the prepared baking sheet in a single layer, allowing space between each piece.
Cooking
- Bake the chicken tenders in the preheated oven for 20-25 minutes or until golden brown and cooked through (internal temperature reaches 165°F).


Leave a Reply